This video will show you how to check if your RAM is functioning using the Windows Memory Diagnostic Tool. It includes the following:
- Event Viewer Properties
- System Log
- Check For Memory Problems
Using The Memory Diagnostic Tool in Windows
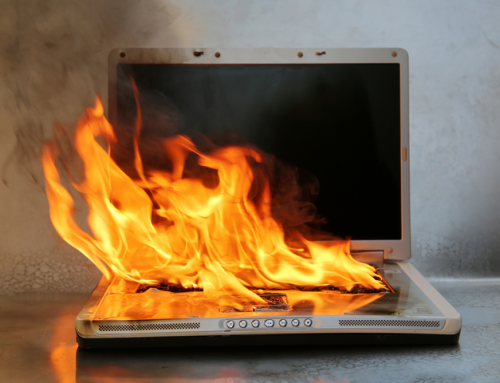
On most computers and devices, Some apps keep crashing or stop responding. Others may have processes and services that keep running your speed down. Weird things can happen and issues arise. The user might see other problems such as freezes or random crashes. A blue screen of death can be the result of these issues as well. Getting to the source of the problem can be a difficult task to accomplish. Because of this, the issue is either with the software or hardware.
Whatever you do, first save your work and then start the diagnosis. It’s the RAM of the PC that you want to check first. If there are problems with one of the modules, take care of it ASAP. This prevents any further damage and corruption to your user files. In addition, you can use the built-in memory checker. It’s used to examine whether the data sectors on your RAM chips are working.
There are several software applications that help you analyze your PC. These are usually available on the internet. However, Windows comes built-in with its own troubleshooting software. It works by writing data to each sector of the computer’s RAM devices. Then reading it back while it fills up your available system RAM to maximum capacity. Thus, it helps it to investigate data storage and transfer issues. If the software reads an indifferent value, this shows you that your RAM is the problem at hand.
Why is my RAM faulty?
There is a variety of reasons for your PC’s memory to stop working. Some of the most common causes are excessive heat in the component, corrupt software, or a faulty power supply. If you’re busy experiencing issues with the performance and stability of your system, it would be prudent to do some further tests on the system. Tools such as Windows’ built-in memory diagnostic software is useful for coming to the root of the problem.
Other symptoms of RAM related issues may be:
- Your system randomly restarts from time to time, when you’re not initiating the restart.
- Files that you access most often become corrupt or unreadable.
- Your PC fails to install an operating system.
RAM can also be damaged by a number of factors:
- Power surges are potentially harmful to your components. Especially if you don’t have a UPS connected.
- Static current can be the culprit. Handling the components inside without grounding yourself can cause damage.
- Overheating causes components to wear faster than usual. Ensure that you have sufficient cooling for all components in your computer. The most important components being your RAM, CPU, and hard drives.
- Overclocking may cause problems with system voltage. It either causes the component to overheat or to fail. We recommend you to only overclock your system if you know what you’re doing.
- Some RAM modules come faulty from the factory. Hardware duds can be returned to the supplier and swapped, at no cost to you.
Checking your RAM for errors
- Open the Control Panel.
- Click on System and Security.
- Scroll down and select the Administrative Tools.
- Double-click and run the Windows Memory Diagnostic shortcut among the list of tools to run.
- Select Restart now and check for problems.
There are 2 available options after opening it. You can start it instantly by proceeding to close or shut down all of your open programs. Then restart your computer to begin the test. Or schedule the test for the next time you start up the computer. If you want to test your hardware right away, then select the “Restart now” option. Your PC will warn you to close any open software and processes that are currently running. Then it will begin the shutdown process.
Once the PC has restarted, it will automatically run the tool. After it loads up, it will show some advanced options to choose from. The tests should run right off the bat without having to adjust anything. In the automatic mode, the test runs all the scans that are available in the Basic test mode.
You can select from your variety of test options. Furthermore, these options tell the software how to run the testing phase, to check your RAM for any faults or errors.
Advanced Options
There are advanced options available. These are extra settings for running a memory test with Windows’ diagnostic tools. However, we recommend allowing the test to run naturally. As a result, this makes sure that the test runs in accordance with default settings. To change the settings and display the advanced options is simple. Press the F1 key on your keyboard when it starts up. You can change the following settings:
- Test mix – This is how you choose to run the test. So, there are 3 tests that you can initiate – Basic, Standard, and Extended.
- Cache – If you need, pick the cache setting you want to run for each test.
- Pass count – Last one, this lets you set how many times you want to run the test.
After adjusting the settings, you can start the test by pressing F10 on your keyboard. The software will run for a few minutes, and it will display your results once the test is complete.
Analyzing the Test Results
Once the test has finished, Your PC will start up with a notification pop-up which will appear with the results. You can also display the test’s results by starting up the Event Viewer. Clicking on Windows Logs > System. In conclusion, select the most recent results from the log. They can be found within the MemoryDiagnostics-Results source.
- Firstly, open the start menu.
- Search for Event Viewer (eventvwr.exe).
- Expand the Logs folder of your operating system.
- Right-click on System, then select Find.
- Type in “MemoryDiagnostics-Results” and search for the logs.
- Lastly, double-click on the source to view the results.
If the results display one or more errors, restart the test in extended mode. Don’t forget to re-check the results for any differences in logs. If an error persists, the problem is one of your RAM modules. You will then have to get the problematic one replaced.
We hope that you’ve found this guide helpful. For more on how to use the Windows Memory Diagnostic Tool click here and here.
For any further assistance, contact us via the website. Getting in touch with one of our techies is easy and instant. Email us at [email protected] for any advice, quotes and computer problems. Head to our getatechie homepage to view our competitive pricing.